Scope Mounting Instructions

How to Get the 3-15 Mounted on a Rifle
There are some manufacturers that will recommend only a qualified gunsmith should mount a scope to a rifle.
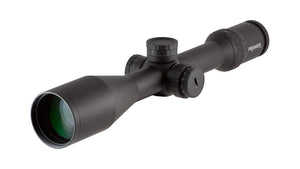
There are some manufacturers that will recommend only a qualified gunsmith should mount a scope to a rifle, as they will have the proper equipment and knowledge to adequately perform the task. However, by using the right tools for the job and taking some simple precautions, almost anyone can successfully mount their Heritage™ 3-15 in a set of rings.
Getting the rings mounted:
- Set the rifle in the cradle and get it level using the Wheeler level placed on the bolt raceways, this will level the receiver of the rifle. If the Wheeler levels are not available a standard level placed on top of the picatinny rail will work, although not quite as well, just keep in mind that not all bases are perfectly level to the receiver.
- Loosen the nuts on the cross bolt and place the rings on the picatinny rail with the nut facing to the left side. The Heritage™ has approximately 6.2” of ring mounting space and the farther apart the rings are, the better.
- Once the rings are on the rail, push them forward in the mounting slot, and use the appropriate wrench to tighten them down slightly to prevent movement.
- Now use the 65 inch/lb torque wrench to finish tightening the cross bolt, only one pass with the torque wrench will work. The rings are now secured to the mounting rail.
- Clean the ring cap screws with acetone to remove any grease or other material and use a q-tip to clean the threads on the ring base as well.
Mounting the scope:
- Place the scope in the rings.
- Place the ring caps on the rings and tighten the screws slightly but not so that the scope cannot be moved in the rings.
- Move the scope in the rings to get the proper amount of eye relief. The proper amount of relief will be obtained when you will have a clear, full field of view when looking through the scope with a good cheek weld on the stock.
- Ensure that the receiver is still level by glancing at the Wheeler lever placed on the bolt raceways or by other means. Place the other Wheeler level on the flat spot on top of the elevation knob in order to get the scope level relative to the receiver. a. If using a plumb bob, ensure that there is enough distance between the scope and the string so that the string can be seen clearly enough to get the reticle parallel to it. b. If using a magnetic bore sighter, align the reticle with the grid on the bore sighter.
- Use the proper wrench to tighten the ring cap crews using a star pattern, alternating sides until the screws are hand tight. Also ensure that there is an equal amount of space between the two halves of the rings.
- Use the 15 in/lbs torque wrench to finish tightening the ring cap screws using the same alternating/star pattern.
- Ensure the scope has remained level or parallel to the string on the plumb bob. If everything still looks good the scope has been successfully mounted in the rings.
Note: While this method is more time consuming than others, it has proven to be effective time and time again.

